Introduction
On RoundTableFamily.World there is a module that allows a user to be migrated to a new club, keeping the history and movements of the users visible. Changes between clubs need to be done on the national level and by a national admin but in the case where a user moves between associations the change needs to be done by a international admin. Each association can have different protocols on how to do this even though the module is the same. Here we try to explain this how to manage either inside association or between associations because there is always a way even though it’s not always popular.
Changing clubs in the same association
![]()
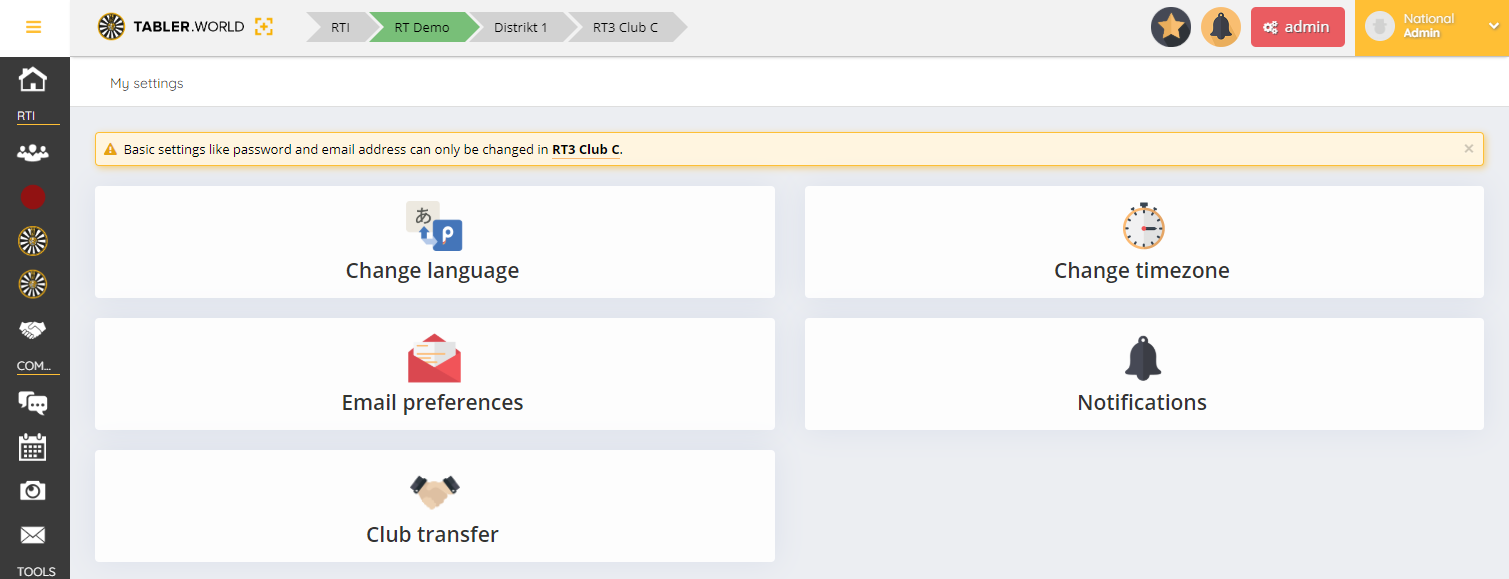
From your profile (your name, image top right corner) click My settings and from there click Club transfer when on the settings page. Instructions will show in a window how to change the club. There is no default form, it’s basically up to the association to decide how this is handled.
As a default, in case the is no information on how to transfer or it’s not clear you need to contact either your table or the national board. After all it’s the national board that needs to do the move. But best would be that the table board requests this to the national board.
*Please be aware that if the club transfer icon is missing you are either on the international level and not on your association/area/club level or the association has not defined the field responsible to change this*
Changing clubs between associations
A change between associations is possible but can only be performed by the international support via a support ticket. To request a association change we request that the a board member of the new club, a national board member or national admin sends a ticket where the name, previous association/club and new association/club is included. For example:
Member: John Johnson
From club: RT1 Name - Norway
To club: RT10 Another Name - Sweden
After the change has been made the user’s old access will be closed and re-opened in the new club. But the user can show off in his history area of the profile where he was.
How an admin can do the transfer
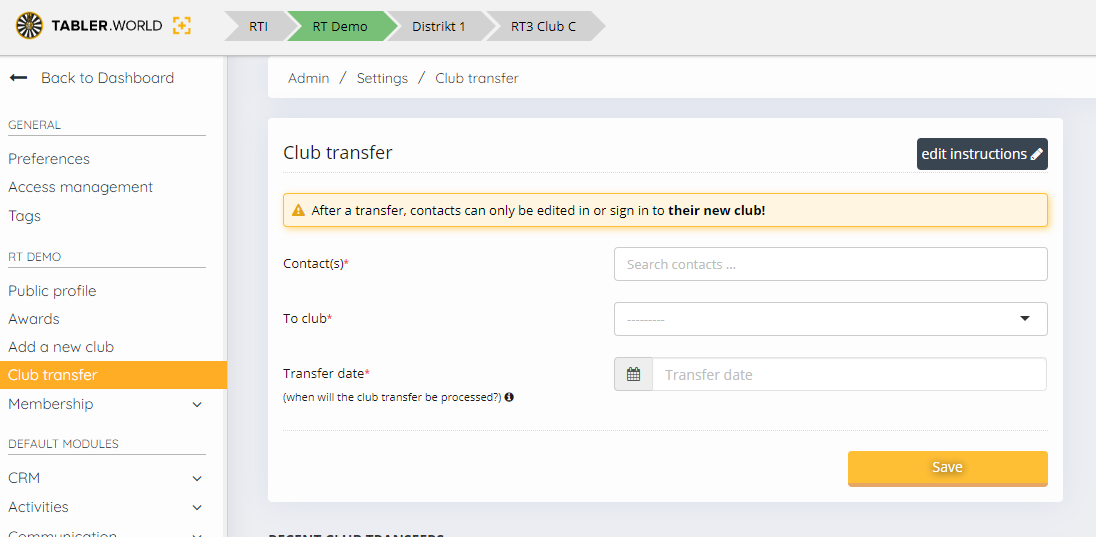
Open the admin menu from your national level and navigate to Settings. Once there you see the menu item Club transfer. Here you
- Choose the contact(s) from the drop down list. Yes you can migrate more then one at a time in case you need
- Choose the club to which the user or users will be migrated to
- The transfer date represents when the old member function is terminated and the new function begins.
Click on save and below the page you will see a list of transfers and the status of each of them.
![]()
To edit the instructions to the regular user
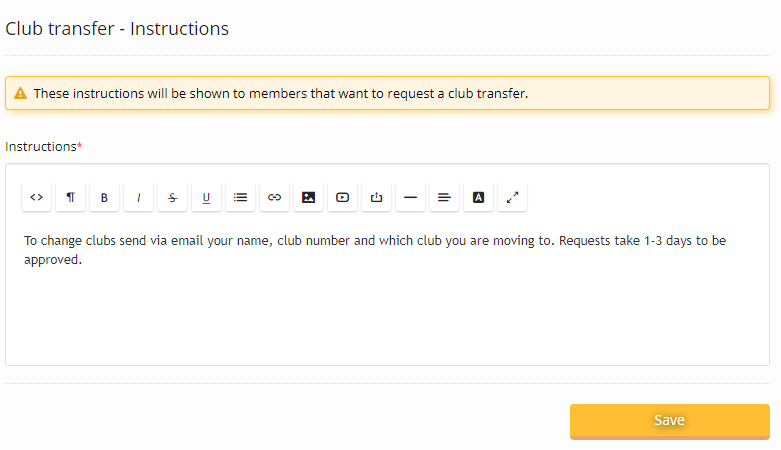
On the Club transfer page you see a button called edit instructions. If you press that a new page will open with a textbox. Write in this box your instructions that the regular user will be able to see from his settings.
This post is also available in:  Deutsch (German)
 Nederlands (Dutch)
 Français (French)
 Svenska (Swedish)
