Introduction
It is possible for an association to generate documents for Tablers. This is used for example to generate a certificate of Table membership. When a new member is added, a document is generated and send to an email or when an national admin visits the Tabler membership page, the document can be generated.
Note: the document is only automatic generated (and send to filled in email adres in the template) when a member is added when the next 3 conditions are met:
1. The function member is entered when a member is added.
2. The member function will start in the future.
3. The option Generate automatically for new members? is set to on in the template.
Generate Document
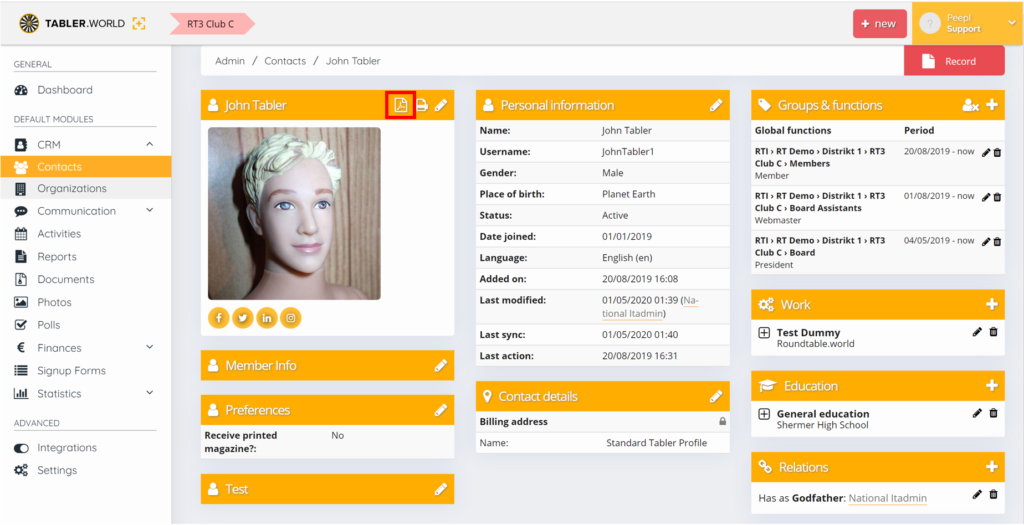
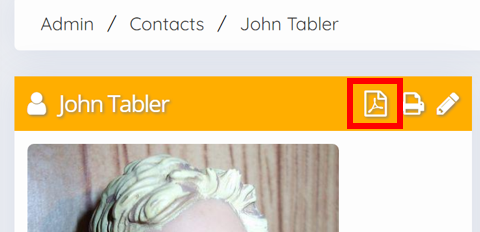
To generate the document go as an national admin to a Tablers profile using the CRM system. and click on the PDF document symbol of the Tabler above the Tablers picture.
Select the template that needs to be generated.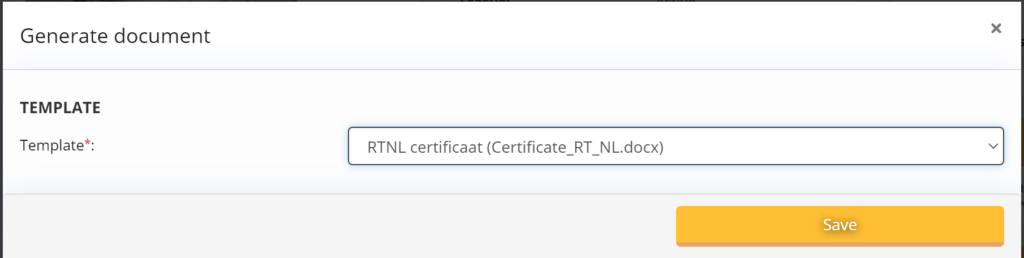
select save and the document will be generated and when finished you can download the file.

Create your own template
1. Create the template
Open Microsoft Word and create a new document. Design the document to your own wishes. Be aware that watermarks are converted into pictures
2. Adding Simple Merge Fields
- Click where you want to place a merge field.
- In the Insert tab, click Quick Parts and then Field….

- Under Categories, select (All).
- Under Field names, select MergeField.
- Type the name of the merge field under Field name (use only fields available in Tabler.World).
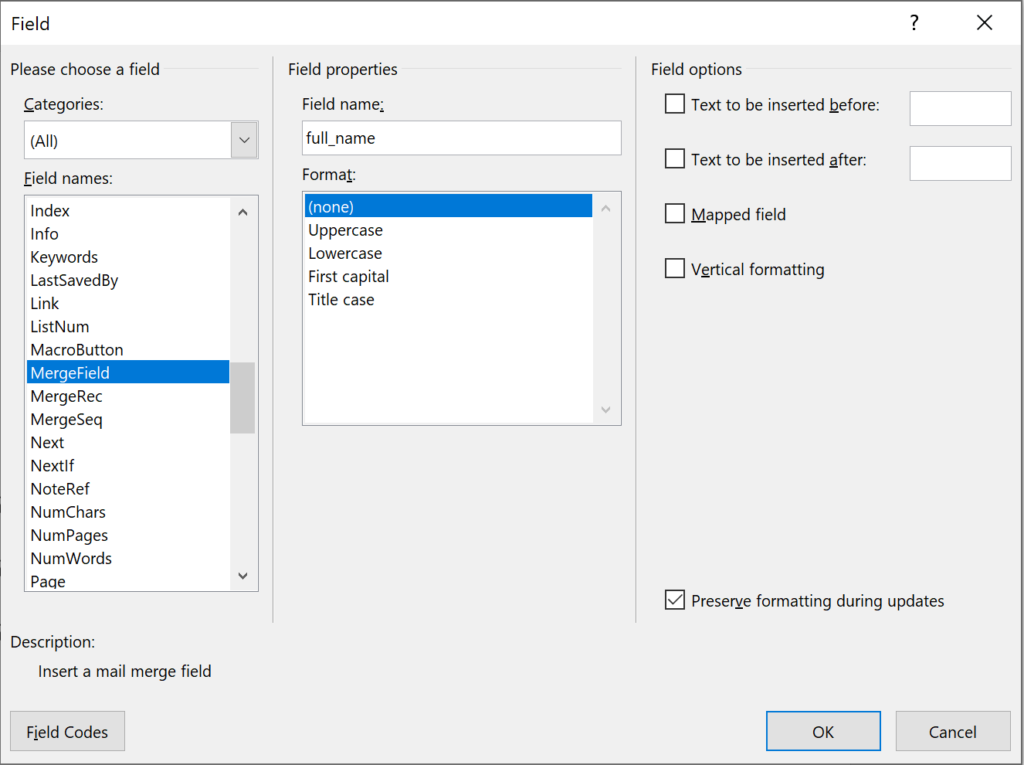
- Click OK.
Note: You can’t manually insert brackets to generate a merge field.
Mergefields available
You can only use the following Mergefields to link to Tabler.world:
- first_name
- last_name
- full_name
- first_name_abbreviations (only if available)
- club_name
- street1
- street2
- postal_code
- city
- country
- member_from_date
Show field codes
If you open the Word document and the fields ar not visible select all text and right click. then select Toggle Field Codes.
3. Template in Tabler.World
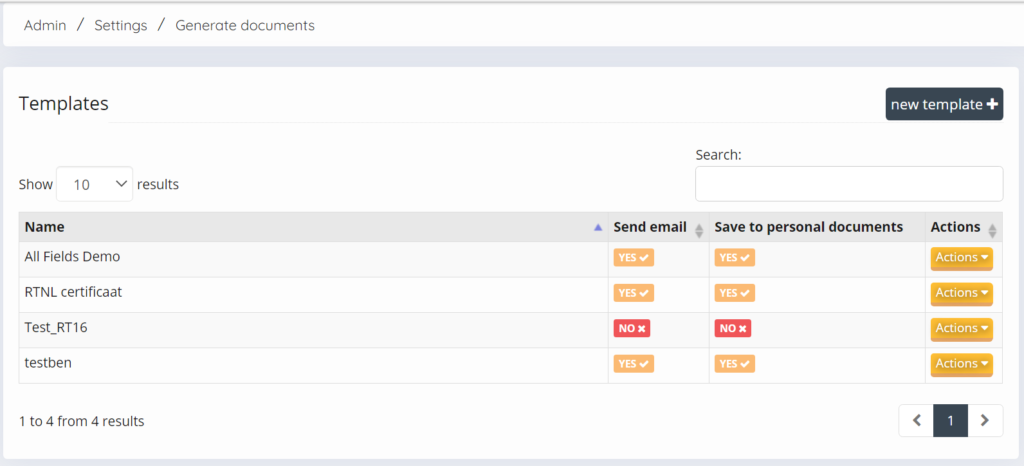
National admins can go to generate documents via Admin > Settings > Documents > Generate documents.
press new template to add one an template.
Template
give the template an unique Name and upload the Word document .docx file created in ms Word.
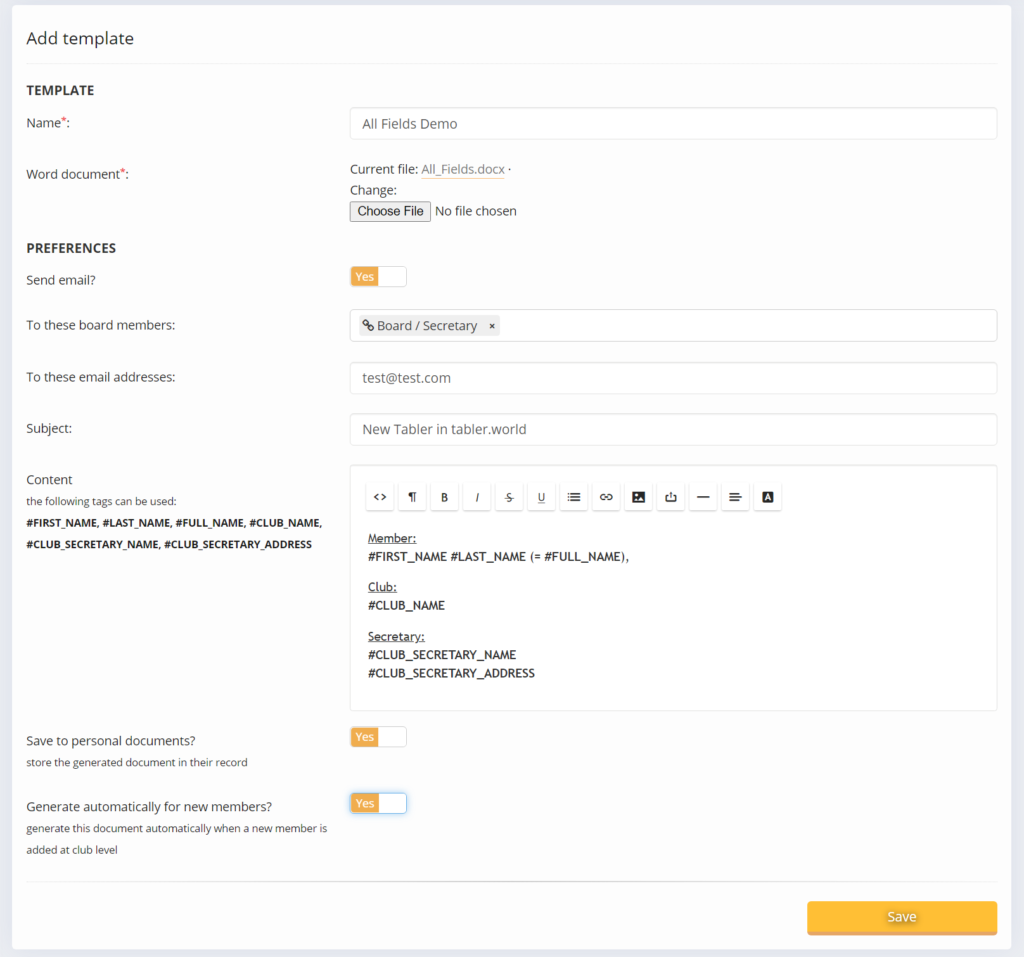
Preferences
Select if you want to Send email? when a document is generated an email will be send. this can be done when using the PDF document button or using the option Generate automatically for new members.
Select to these board members and add email addresses to these email addresses where the email should be sent to. You can add more email addresses in the filed to these email addresses using a comma to separate the emails addresses “, “.
in the Content you can insert the email content that will be send with the generated document. in this email you can use different tags to show from witch Tabler the document is generated.
You can only use the following tags:
- #first_Name
- #last_name
- #full_name
- #club_Name
- #club_secretary_name
- #club_secretary_address
Note: These tags are different then used in side the document watch carefully to use the correct tags at the correct position.
Note: please keep in mind that the filed to these board members or to these email addresses need to filled otherwise you will get an message that a mandatory field is not filled.
Save to personal documents is an option when set to yes then to the Tablers record in his documents tab every newly generated document will be stored.
Generate automatically for new members is an option when set to yes when somebody add a Tabler in a local club on the end of the flow of adding a Tabler and a member is added with a from date the document is automatic generated. if the option send email is also on an automatic email is send.
4. Finding the saved generated document
When you are an admin on national level you can find the saved document in the record of a Tabler. go to the local table go in as support. Then go to CRM > Contacts > select Tabler > Action > Record > Documents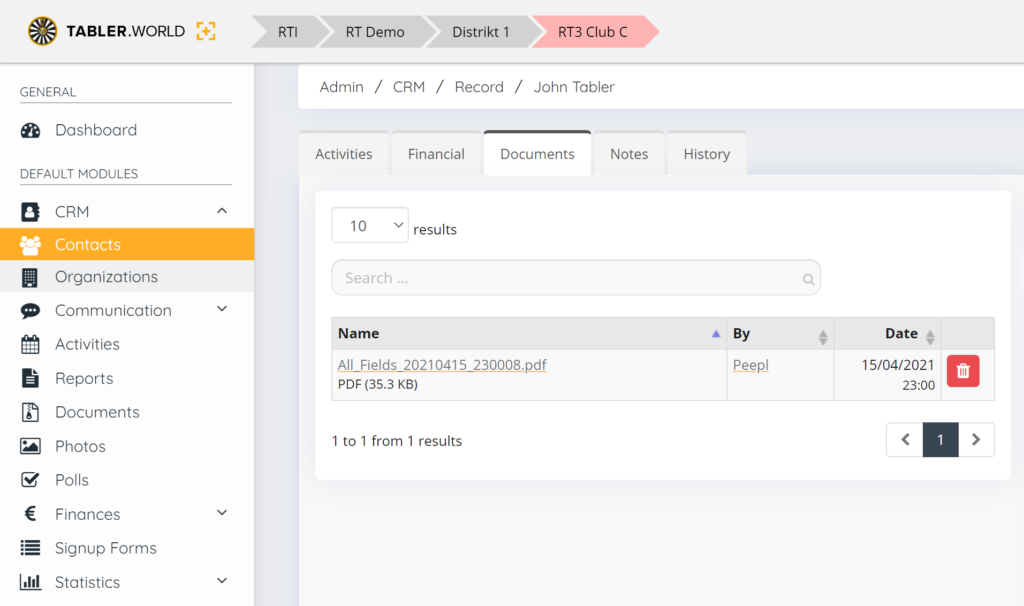
This post is also available in:  Deutsch (German)
 Nederlands (Dutch)
 Français (French)
 Svenska (Swedish)
